
If you have ever had an SD card suddenly stop working, you probably know the usual routine. Try it in the camera again, try another card reader, try another computer, and when absolutely nothing detects it, assume the card is dead.
Fair enough. But why is it dead?
That is the question I find far more interesting, because a dead SD card does not automatically mean dead NAND memory, and it certainly does not mean the data stored on it has disappeared.
Monolithic SD cards make this even more interesting because most of the electronics are buried inside what is essentially one solid package. You cannot simply look at the board and immediately see a controller, NAND chips, capacitors, resistors, and everything else you would normally expect to find on a traditional flash device.
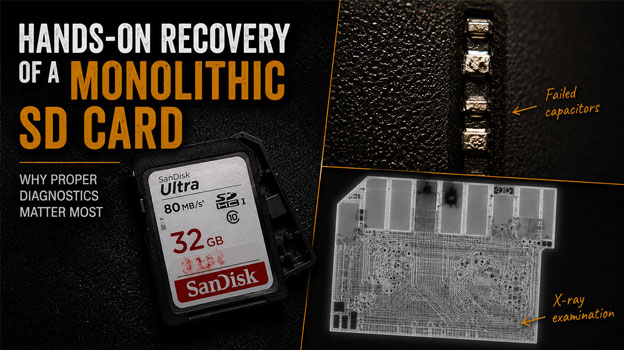
Recently, we had a perfect example of this. A SanDisk Ultra 32GB SD card arrived completely undetectable, and what initially looked like a potentially complicated flash recovery eventually came down to two microscopic components hidden inside the card. So, rather than just showing the final result, I thought this would be a good opportunity to go through the actual recovery process and explain what happened along the way.
The Patient
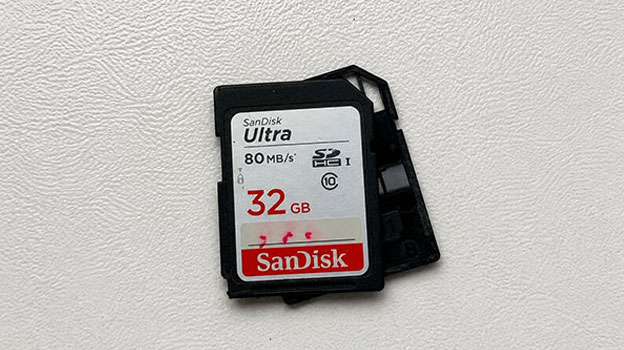
Here it is: a fairly ordinary-looking SanDisk Ultra 32GB SD card.
There were no cracks, burn marks, broken contacts, or anything else on the outside that immediately screamed hardware failure. The client simply reported that the card had stopped working and could no longer be detected by the camera or a computer.
This is where proper diagnostics become extremely important. We could immediately start thinking about NAND access, pinouts, controller problems, or any number of other possibilities, but without knowing what actually failed, we would essentially be guessing.
Before doing anything invasive, we needed to find out why the card was dead in the first place.
Initial Diagnostics
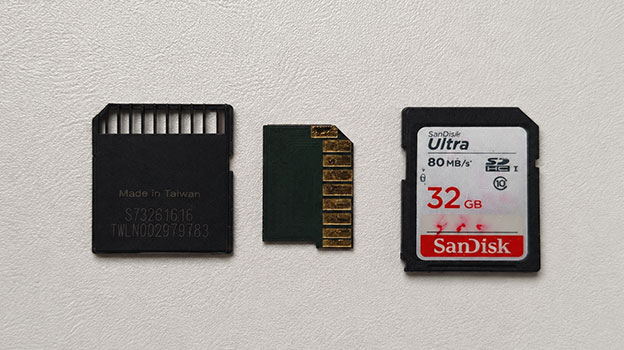
The first step was electrical testing, and this immediately gave us something useful to work with. Measurements revealed a direct short circuit between the positive supply rail and ground. In plain English, power entering the card wasn’t getting where it was supposed to go. Something inside the card was effectively pulling the power rail down, preventing the controller from initializing and leaving the SD card completely undetectable. The problem is that finding a short circuit and finding the component responsible for that short circuit are two very different things.
Unlike older SD cards that contain a separate controller chip, one or more NAND memory chips, and supporting components mounted on a conventional circuit board, this card is built as a monolithic package. Much of the circuitry is embedded inside a solid material, so there isn’t necessarily anything obvious sitting on the surface that you can point to and say, “There is the problem.”
At this stage, several possibilities were still on the table. We could have been dealing with a failed capacitor, damaged power circuitry, a controller problem, internal substrate damage, or potentially something involving the NAND itself.
Rather than start removing material and hoping we stumbled across the problem, we needed to narrow down where that short was coming from.
Time For The Thermal Camera
Thermal imaging has become one of my favorite diagnostic tools for electronic failures because it gives us another way of looking at a circuit.
If a component is shorted or drawing considerably more current than it should, that energy has to go somewhere, and quite often some of it ends up as heat.
With power applied to the card under controlled conditions, we could watch for an area heating differently from everything around it.
And sure enough, something showed up.
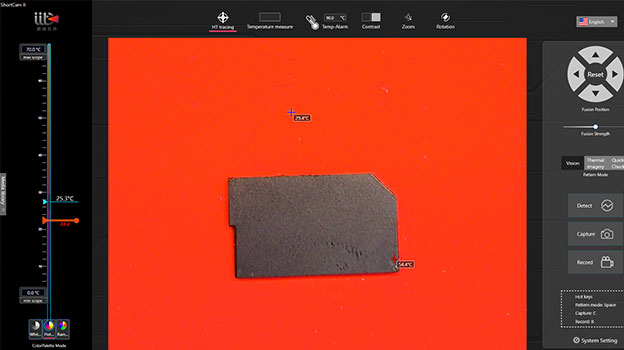
One small area of the card began heating considerably faster than its surroundings, eventually reaching approximately 44.5°C, while most of the card remained much closer to room temperature.
Now we were getting somewhere.
The card was examined again from another orientation to make sure we weren’t simply looking at a misleading thermal reflection or another nearby source of heat.
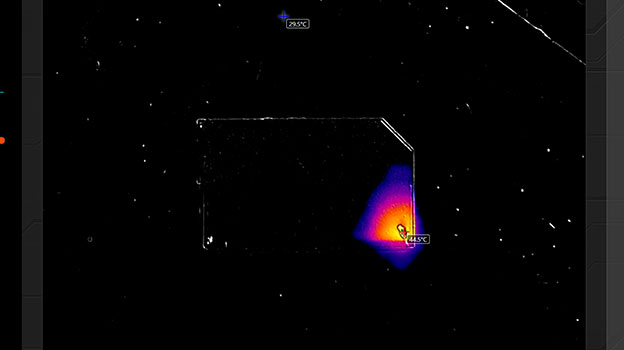
Same area, same result.
That gave us a much better idea of where the electrical problem was located, but it still didn’t tell us everything we needed to know. Remember, much of the circuitry in a monolithic SD card is buried inside the package, so knowing where something is getting hot doesn’t necessarily tell you what is electrically connected underneath it.
For that, we needed another set of eyes.
Let’s X-Ray It
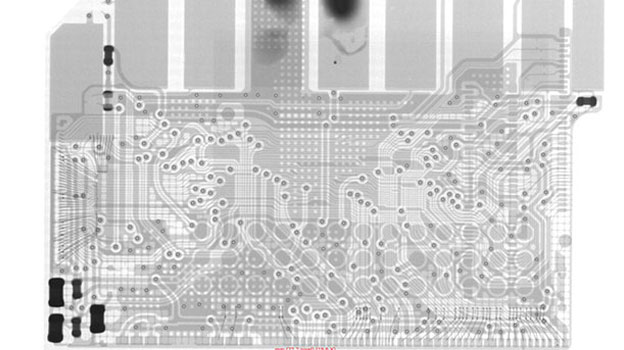
This is where things get a little more interesting. An X-ray allows us to see internal copper layers, buried traces, vias, and power routing that simply cannot be seen through a microscope because they are physically sealed inside the monolithic package. If the thermal camera tells us where something suspicious is happening, the X-ray can help us understand what is actually hiding there.
Comparing the X-ray with the area identified during thermal imaging allowed us to trace the suspected components back to an important part of the card’s power circuitry. We also weren’t seeing evidence of some larger structural failure that would immediately send the recovery in a completely different direction. Now we had multiple pieces of diagnostic information pointing toward the same area, which is considerably better than removing components and hoping for the best.
Opening Up The Problem Area
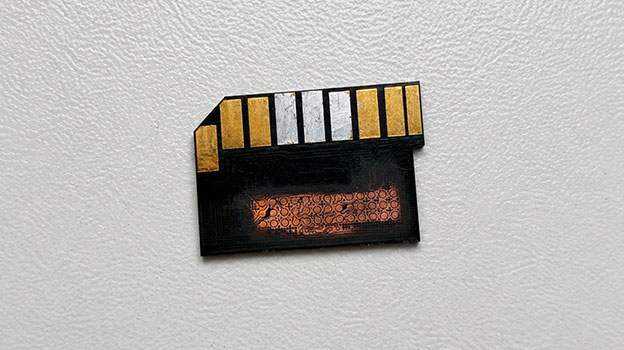
Now that we knew where to concentrate our attention, we could begin exposing the circuitry in that specific area of the monolithic package. This is where a precision rotary engraving tool and some very fine carbide bits come into play. Under a microscope, the protective material can be carefully removed layer by layer until the components and circuitry underneath become accessible.
And when I say carefully, I mean carefully.
We are dealing with fractions of a millimeter. Go too deep and it is possible to cut through a trace or damage something that was perfectly healthy before we touched it. Don’t go deep enough and there isn’t much point because the components we need to inspect remain buried underneath the material. There is no prize for getting through this part quickly. The idea is to remove only as much material as necessary while leaving everything underneath it alone.
This is also exactly why the thermal and X-ray diagnostics came first. Instead of blindly removing material from the card looking for something suspicious, we already had a specific area of interest and a much better understanding of what was hiding underneath it.
So, What Is Hiding Under There?
Once enough material had been removed, we could finally start getting a better look at what was hiding inside the card.
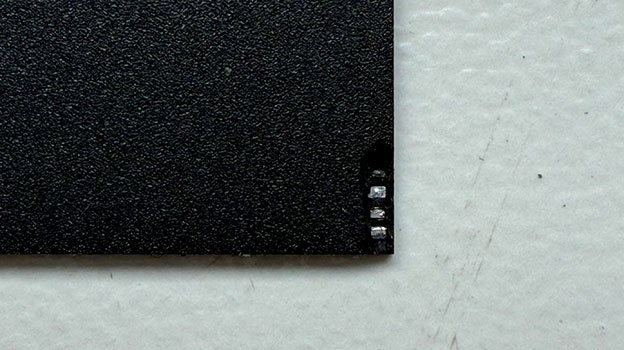
Several tiny components were now visible, including capacitors associated with the card’s power circuitry. These things are absolutely tiny, but size does not make them unimportant. A failed capacitor on the wrong power rail can prevent the controller from initializing and make an otherwise perfectly recoverable SD card appear completely dead.
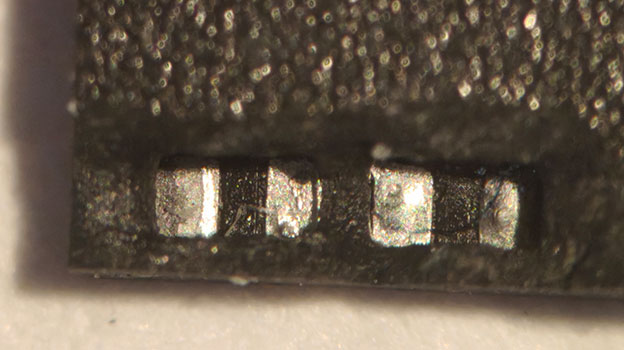
At this point, we weren’t about to start removing components just because they looked suspicious. The thermal imaging and X-ray examination had brought us to the correct area, but the individual components still needed to be electrically tested before anything was removed.
This isn’t about removing or replacing parts until something works. Each component needs to be proven faulty, because it is very easy to introduce new damage into an already fragile storage device while trying to repair a problem that was never there in the first place.
Finding The Actual Problem
Further electrical testing finally narrowed the problem down to two microscopic capacitors responsible for the short circuit.
There was our failure.
The two defective capacitors were carefully removed and the electrical measurements were repeated. The short circuit that had previously been present was gone, which meant we could finally attempt to power the card normally. And this is where the case became particularly interesting.
The controller initialized.
Remember, this card had arrived completely dead and undetectable. At this point we had not extracted the NAND, reconstructed its contents, performed a pinout recovery, or done anything particularly exotic with the memory itself. We had simply diagnosed and repaired the electrical problem that was preventing the card from starting in the first place.
Now we could find out what condition the actual data was in.
Those Green Blocks Are A Very Good Sign
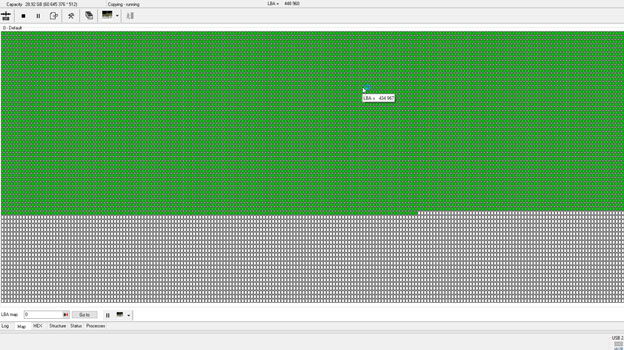
The repaired card was connected to our PC-3000 Flash recovery system and, for the first time since it failed, we were getting successful reads from the NAND memory.
Those green blocks on the screen may not look terribly exciting, but when you work in data recovery, this is exactly what you want to see. Each one represents memory pages being successfully read from a card that, not very long before this screenshot was taken, wouldn’t communicate with anything at all.
This was also a good opportunity to record the process rather than just take another screenshot.
Video: PC-3000 Flash reading the repaired SanDisk SD card in real time.
At this stage, the electronics repair had done its job. The controller was communicating with the NAND memory again and we could move on to the part that actually matters to the owner of the card: the files.
Did The File System Survive?
Getting a device to read again is obviously good news, but it doesn’t automatically mean that the file system and files stored on it are in good condition.
So, what did we find?
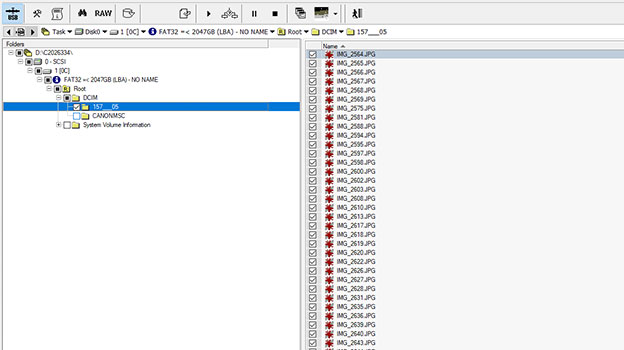
In this case, the result was about as good as we could ask for. The FAT32 file system remained accessible, along with the original directory structure, filenames, timestamps, and the client’s photographs.
This is particularly important because there is a big difference between recovering a pile of raw files and recovering the original file system. RAW recovery can certainly save the data, but filenames, folders, and other file system information may be lost in the process.
Here, that wasn’t necessary. Once the hardware problem was resolved, we were able to access the original file system and proceed with recovery from there.
Why Does Any Of This Matter?
Here is where I think this case becomes a useful example rather than simply an interesting repair.
There is a tendency with failed monolithic flash devices to immediately jump toward the most complicated explanation. The card is dead, therefore the controller must be dead. Maybe the NAND has failed. Maybe we need a pinout. Maybe we need to read the NAND directly and reconstruct everything.
Those are all legitimate recovery methods, and there are plenty of cases where they are absolutely necessary.
But not this one.
In this case, the NAND memory wasn’t responsible for the failure, nor was there anything indicating that the controller itself had died. The card couldn’t initialize because two tiny capacitors buried inside the monolithic package had failed and created an electrical short.
Had we jumped directly into a more invasive recovery procedure without properly diagnosing the card first, we would have been solving the wrong problem.
Thermal imaging helped us narrow down the physical location of the fault, X-ray imaging gave us a better understanding of the circuitry hidden inside the monolith, and component-level electrical testing finally identified the failed capacitors. Once those components were removed and the short disappeared, the controller could initialize and the card became accessible again.
Conclusion
So, what is the big takeaway from all of this?
For me, it is pretty simple: don’t confuse a dead storage device with dead data.
A memory card that isn’t detected by a camera, computer, or card reader is certainly not in good shape, but that tells us surprisingly little about what actually happened inside it. Sometimes the NAND is failing, sometimes the controller is damaged, sometimes the internal circuitry has been physically compromised, and sometimes the entire device is being brought down by components so small that you can barely see them without magnification.
That is exactly why proper diagnostics matter.
You can own all the expensive recovery hardware in the world, but if you start solving the wrong problem, none of it is going to help very much.
In this case, two tiny capacitors were enough to make a perfectly recoverable 32GB SD card appear completely dead. Finding them required electrical diagnostics, thermal imaging, X-ray examination, careful removal of the material covering the affected area, and component-level testing.
Once we knew what we were actually looking for, the rest of the story became considerably simpler.
Find the failure first. Then figure out how to recover the data.